Image annotation with ImJoy
This is performed with the Annotator plugin running in ImJoy.
Note that annotation can only be performed on 2D images. If your images are 3D, please convert them first to 2D images, e.g. with a maximum intensity projection.

To annotate your images, follow these steps
- Open the annotation plugin by clicking on the plugin name
ImageAnnotator -
The plugin will open with a default image and you have to load your own data.
- Press on the
Filedropdown menu in the upper right corner - Select
Import Samples - In the new dialog press
Choose Filesand thenSelect Local Files. In case your files are on a different drive, you can specify the drive fromOptionsandGo to folder. - In the dialog, select the parental folder containing all sample folders.
- ImJoy will display a dialog saying "This will upload ....", confirm. Your data only be "uploaded" to your local browser BUT not on an external website.
- This will populate the interface with all sample folders. For each folder,
you see a little icon representing a file being present in the folder.
You then have to set a filter on the file-name for the channel which will
be read into the Annotator plugin. For this you set a name for the channel,
e.g.
FISH, and the identifier of this image, e.g.green.tif. PressAdd Channelto add this channel. You then see this channel as an additional entry in the interface. - Press
Importto open the Annotator with the specified files. - You then specify your annotation: from the
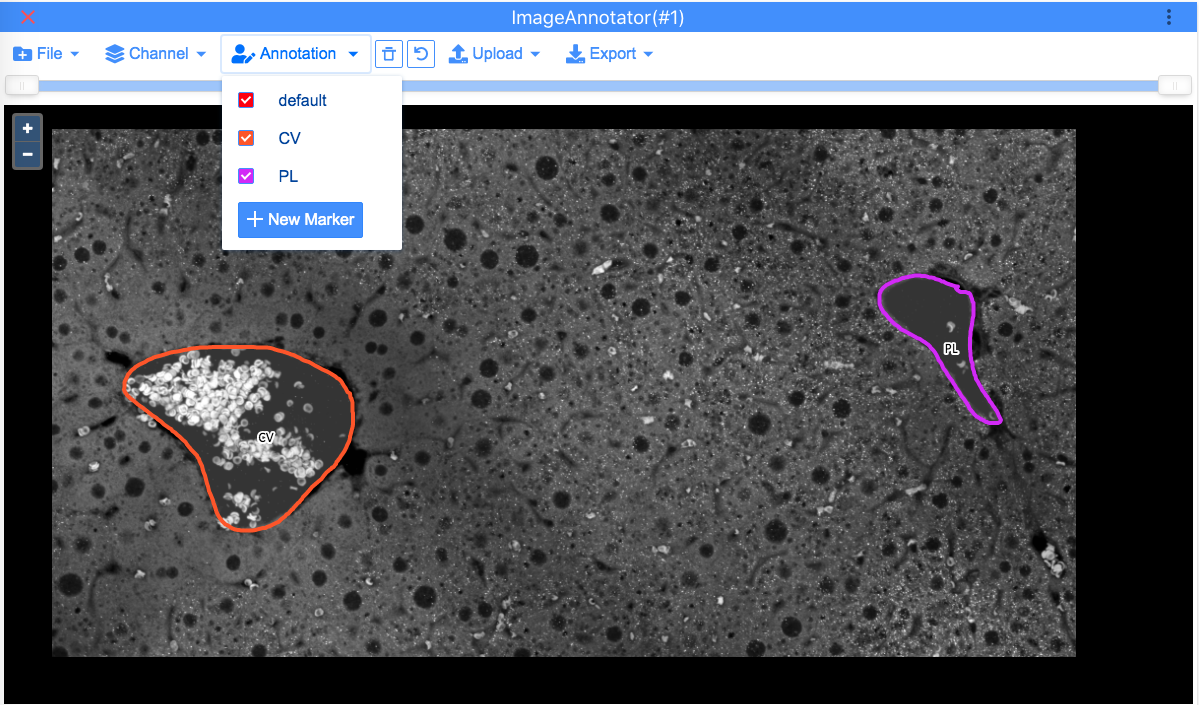
Annotationdropdown menu, you can specify which annotations you want to perform. - By pressing
New Markeryou can specify an new annotation type. You can define its name, the colour in which it will show, and what type (use Polygon). - Once you defined the annotation types, you can annotate your image.
- Press on the
-
Then select which file you want to annotate (from the
Filedropdown menu), and annotate the two different regions. To annotate, press on one of the annotation types, go to the image, and start annotating. For a polygon, simply press the mouse button, draw your region and release once your are done. The example below shows two annotation types, CV and PL.
- Once you are done, you can export the annotations from the
Exportsdropdown menu and selecting theAll annotationsoption.- The annotations will be saved in the default download folder of your browser as a zip file.
- You can then unzip this file. It contains the same folder structure as
your original parental folder. Each sample folder contains a file
annotation.jsonwith the annotations that your created for this sample. - You can then simply copy the sample folders and paste them in the parental folder containing your data (with Windows explorer or Mac OS finder). When asked if you want to merge the folders, confirm.